

Weekend Project: Transform Your Kitchen with Peel & Stick Backsplash
|
|
Time to read 6 min
|
|
Time to read 6 min
The kitchen is the heart of a living place. It is the corner of a home where not only food is cooked, but laughter fills the air during family dinners, stories are shared over coffee, and feelings are expressed with tea. But a stained and torn-out kitchen backsplash can ruin even the welcoming look.
If your kitchen seems to be in a similar condition, then it needs a little renovation. Give your kitchen a fresh new look. You don't need to hire a contractor to complete this simple task. A peel and stick backsplash for kitchen can really help you with this makeover. These easy-to-use tiles are the best options for homeowners looking for a quick renovation option. Roll up your sleeves and get ready to transform your kitchen this weekend. You just need two days (weekend days) for this stunning makeover. Read our weekend guide to install peel & stick backsplash tiles in your kitchen. Our expert tips and step-by-step guide are going to help you through the installation process.
Still wondering why to peel and stick a backsplash for kitchen? Here are some reasons why homeowners need to choose these affordable options. versatile and easy-to-install tiles.
The best backsplash to use in homes is peel and stick. You don't need a contractor or skills to install these tiles. These tiles are a time and energy-saving option in the remodeling projects, as far as this backsplash in the kitchen is concerned. You do not have to wait to dry and to have a messy work of traditional tile.
Peel & stick backsplashes are cheap and cost-effective in the kitchen. The cost of the material is one-third that of traditional tiles. You save money and labor, and the process of DIY is easy. This option of a backsplash for the kitchen is stylish and cost-effective simultaneously.
Peel & stick backsplash provides an excellent design to any kitchen. They can be transformed readily to suit new design trends. There are hundreds of patterns, colors, and textures that you can use. This is the backsplash that is easy to make and has an update for a kitchen.
Peel & stick backsplashes are rental-friendly and removable. They also allowed renters to make improvements to kitchens without damaging walls. This is the greatest backsplash option in a kitchen that can be used temporarily to upgrade the style. Get a modern appearance without violating the rental regulations and budgets.
Begin your remodel with the selection of the appropriate peel-and-stick backsplash. It is a simple and quick project for any kitchen backsplash because of this easy option. Clean and dry the wall before sticking. Measuring: Measure the peel-and-stick backsplash kitchen. Your layout should be planned on Saturday morning to avoid subsequent errors. Backsplash installation is a successful process with good preparation.
Here is a simple material and tool list you will need to install a kitchen backsplash.
1. First of all, clean the wall and remove dirt, grease, or stains for better adhesiveness.
2. After that, check out the wall fitness, look if there is any bumps or depressions. If you found any, fill them out first.
3. After wall pretreatment, mark up starting point.
4. Then, plan a dry layout before sticking the tiles for more precision.
5. Wall pretreatment is essential for smooth installation.
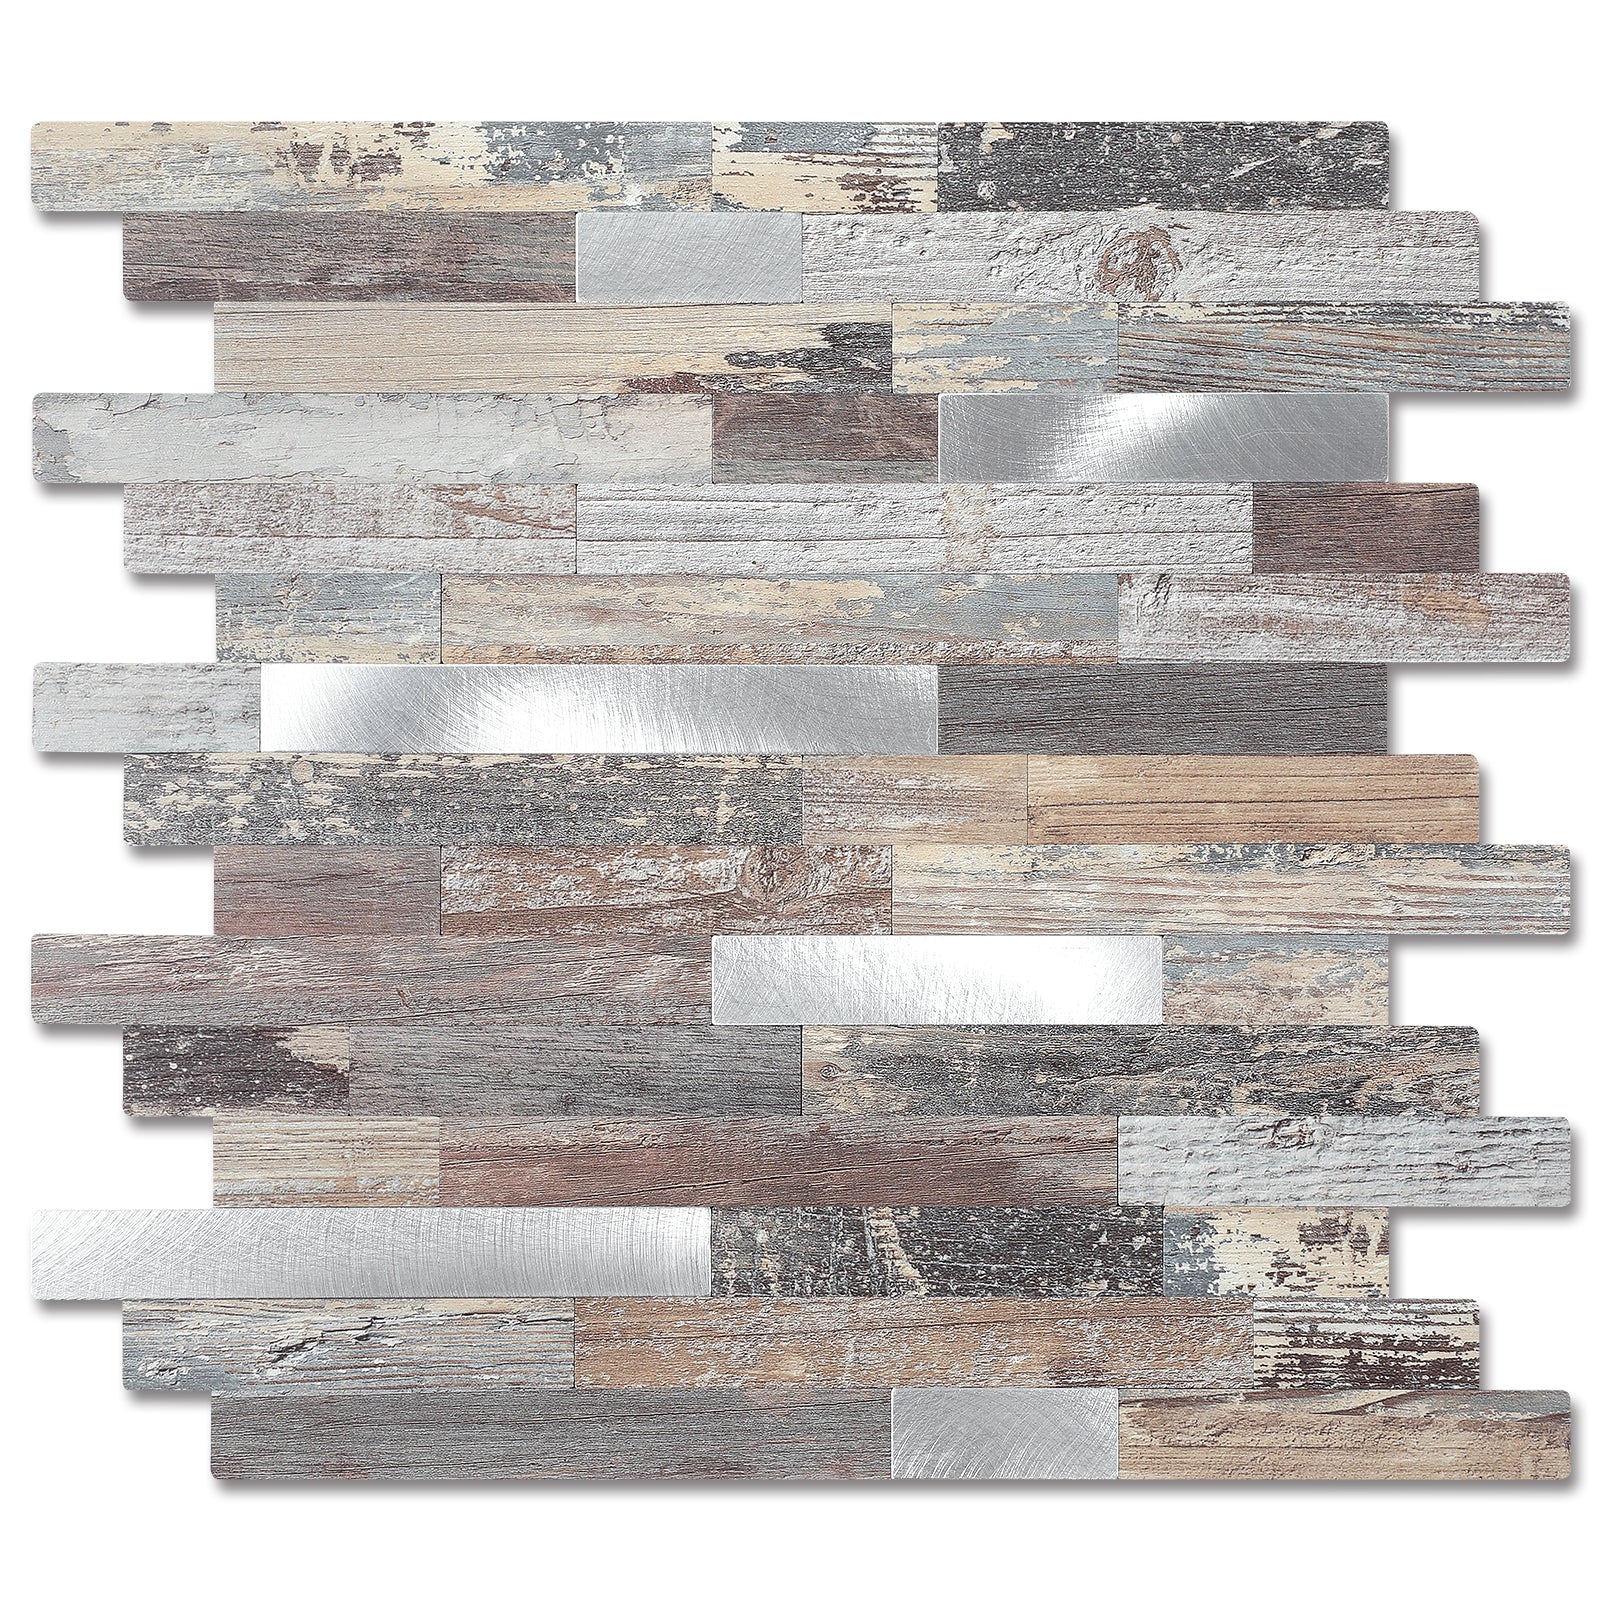
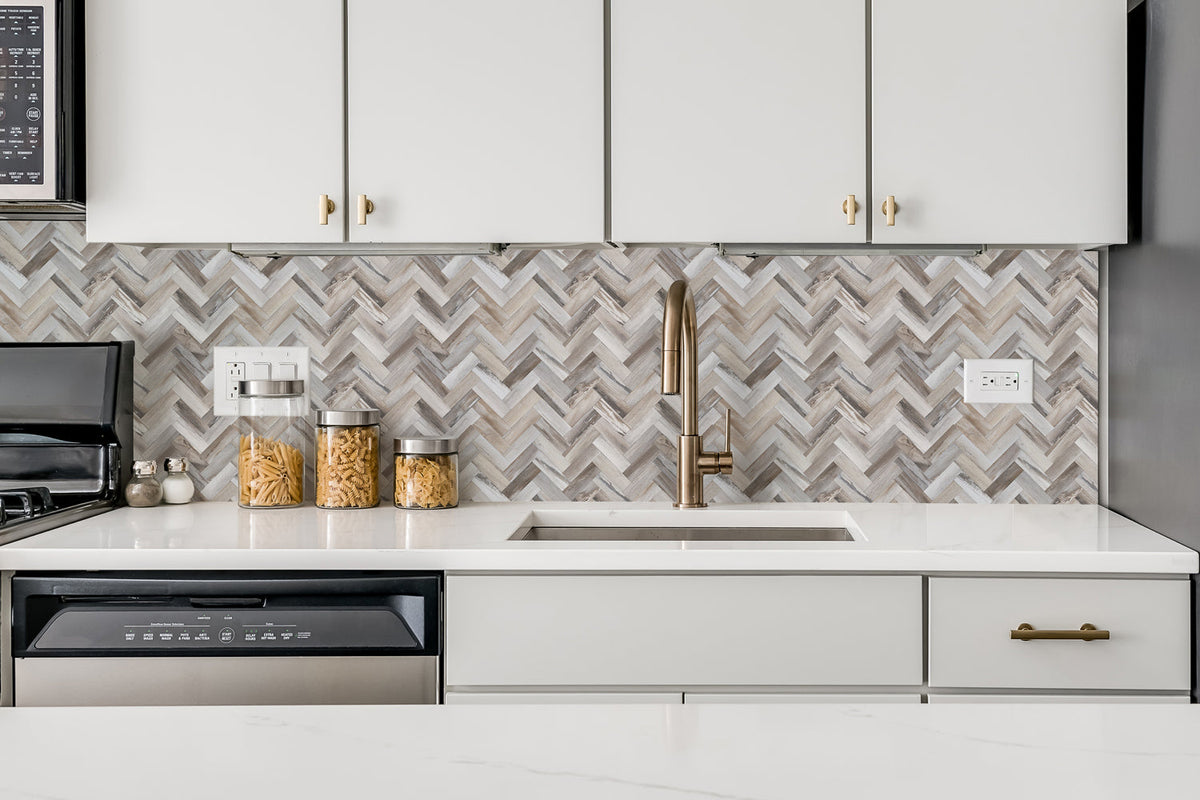
When choosing a peel & stick backsplash, design inspiration matters a lot. Classic subway tile styles bring timeless white looks for traditional kitchens. Contemporary geometric patterns add modern character and visual interest easily. Natural stone imitations give a high-end kitchen backsplash on a budget.
Vintage-inspired patterns create warmth and charm in any traditional home. Metallic luster effects reflect light beautifully, making kitchens bright and stylish.
With peel & stick backsplashes, you see an instant change in your kitchen. They improve the look and style immediately after installation. Every day cleaning is simple, just wipe with a damp cloth. When installed correctly, this kitchen backsplash lasts 2–5 durable years. Replacement is easy, letting you switch to new styles anytime.
Pebble backsplashes cannot be used immediately behind cooktops. The material may be damaged by heat, and therefore, heat-resistant materials should be used.
Tiles would not adhere well if the wall is not a straight line. It is quite possible to smooth the wall to install it better.
Peel & stick backsplashes are not yet waterproof compared to water-resistant. They can be successfully used in kitchens and bathrooms when they are well sealed.
The adhesive of the peel-and-stick backsplash can leave some residue on the wall. Careful removal usually keeps the wall safe with little damage.
In case of a mistake, carefully remove it and rearrange it. Backsplashes made using
peel and stick adhesives can be reinstalled easily.
A peel & stick backsplash is one of the simplest projects you can attempt to handle in your kitchen over the weekend. You will be able to transform your space into something fresh and modern-looking within two days and without the contractor. The tiles are affordable, trendy, and simple to install, which makes them best suited for homeowners as well as renters. Hundreds of designs are offered in any style that you like. Besides this, they are easy to clean, last longer, and it is easy to change whenever you feel like changing. Find yourself with your project in motion this weekend, and you are up with the beauty of your dream kitchen today.


