


Can You Use Peel and Stick Tiles in a Shower? (Full Guide)
|
|
Time to read 13 min
|
|
Time to read 13 min
Shower tiles from a decade or two; the story of every home. You will find almost the exact same thing; try walking to any older home. Tiles stained with mineral deposits, cracked grout lines, or styled in a way that belongs in a time capsule. Replacing them the traditional way means incurring cost and hiring a tile contractor, spending thousands of dollars, living through dust and waiting for mortar and grout to cure before you can use your bathroom again.
It is no surprise, then, that peel and stick tiles already have the attention of budget-conscious homeowners, and especially of weekend DIYers. These self-adhesive panels indeed promise a faster and cheaper transformation.
Peel, Press and Done.
But here comes the BIG question.
Can peel and stick tiles hold up inside a shower?
Yes, but only under specific conditions. This guide walks you through everything you need to know before you start your DIY project. The right products, the right surface, and most importantly, the right technique.
Let's go through the truth about how long these tiles will last when water hits them every day.
Firstly, understand that not all wet areas are created equal. A kitchen backsplash sees the occasional splash. However, the bathroom accent walls deal with humidity. A shower is one of the most demanding; and it tests tile adhesives in ways most other surfaces never will.
The shower cycle drenches the walls with warm to hot water; and fills the air with steam. Moreover, the moisture is not just on the surface; it works its ways into every gap, and micro crack.
Each time you take a hot shower and then let the room cool down, the walls expand and contract. Over months and years, the repeated thermal movement weakens adhesive bonds and causes edges to creep away from the wall.
Daily shower sprays, grout cleaners, and occasional bleach solutions are rough on adhesives. Also, many pressure-sensitive glues that work perfectly in dry conditions tend to soften or break down when exposed to these chemicals.
Here comes the most important factor: when water finds its way behind tile, it has nowhere to go. The dark, warm and trapped condition behind a sealed tile invites mold to thrive. By the time a musty smell appears or discoloration shows through the surface.
These factors "combined" explain why so many peel and stick tile manufacturers warn against shower use. It is not because the product is poorly made, but the environment is extreme.
Yes, but with conditions. Peel and stick tiles can be used in showers when the conditions are met at the same time.
If you miss any one of those three conditions, you are not really installing a shower tile; you are installing a time bomb that will start peeling, growing mold or even damaging the wall behind it in no time.
It is worth noting that many peel and stick tile brands include explicit warnings against shower use in their product documentation. Some of them are transparent that their tiles are not suitable for areas with continuous water penetration. Therefore, before purchasing any product for shower use, read the full product description, and not just the marketing headline.
The safest placement is on shower walls, above the direct splash zone i.e. above the waist height. Moreover, in low use powder washrooms or where the shower runs only a few times. Shower floors, steam showers, and the lower walls that take the full force of the showerhead; are high risk.
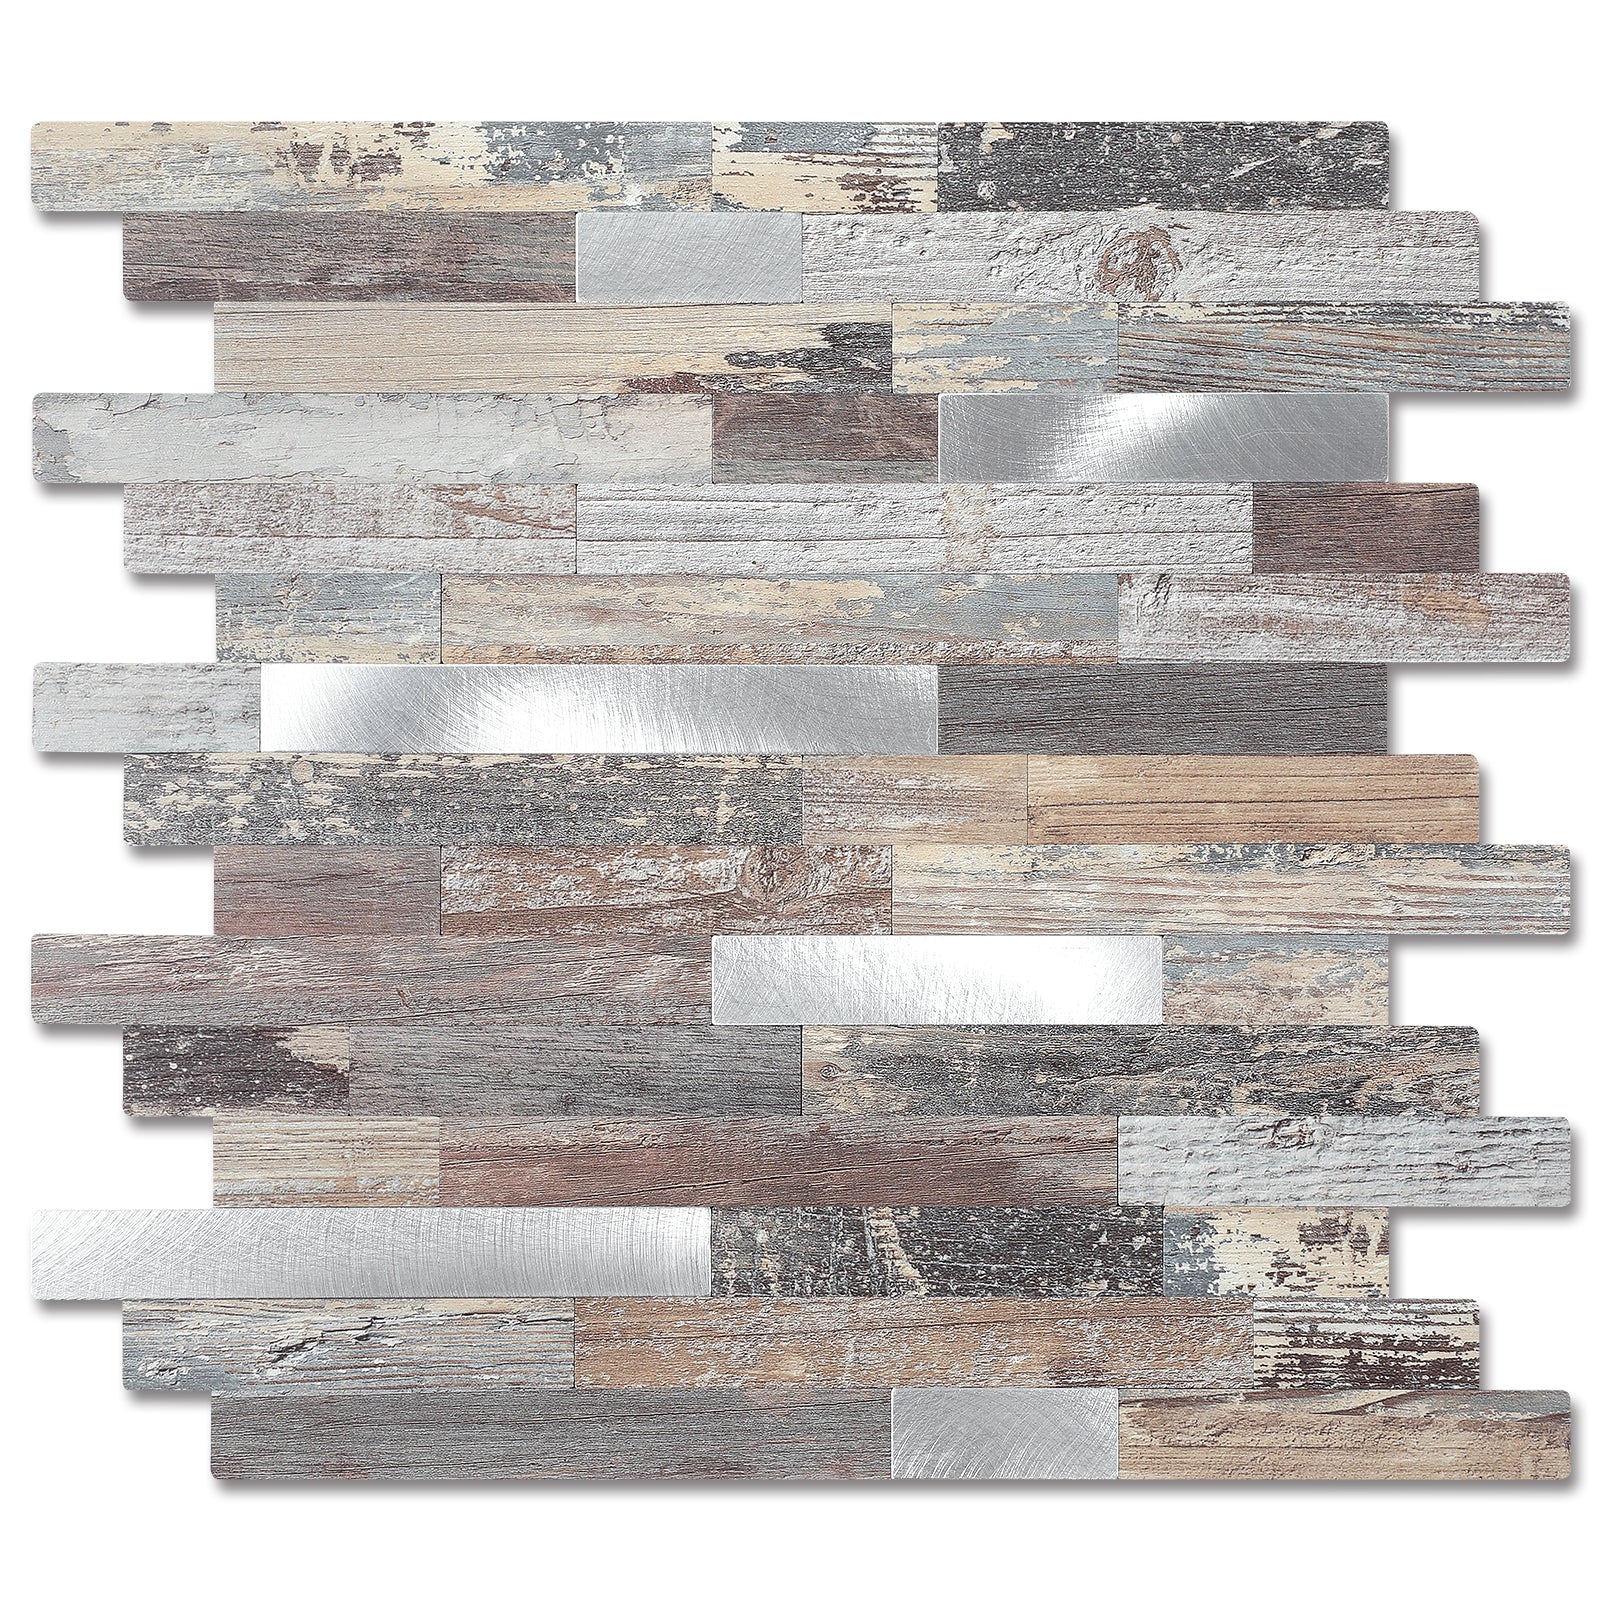
Yipscazo tiles for shower use: Yipscazo's bathroom tile collection is designed with moisture-prone spaces in mind. Once fully installed, after 48-hour cure period. Yipscazo tiles are resistant to bathroom humidity and water splash. The brand recommends their thicker profile tile design; offering better dimensional stability and edge integrity. Browse the Yipscazo tile collection for more suitable shower suitable options.
It is vital to come in with both eyes open. Having said that, there are definitely drawbacks to the peel and stick tiles used in showers and glossing over the situation will not help anyone.
There are times, however, when peel and stick actually makes sense, when expectations are set appropriately.
Not all peel and stick tiles are suitable for showers, and the wrong product will fail no matter how carefully it is installed. Here is what to look for.
Luxury vinyl tile (LVT) and waterproof PVC: These are the most reliable options for wet areas. Both materials are fully waterproof at the core and offer reasonable durability under moderate moisture exposure. When comparing peel and stick tile for bathroom options, prioritize fully waterproof vinyl or PVC construction over paper-backed or thin-film products.
Rigid composite with waterproof backing: Thicker composite panels will hold up to temperature fluctuations, and do not show the edge curling that thinner composites do in steamy areas.
Never use: Thin vinyl stickers, contact paper products, gel tiles with no specific shower rating or any tile with paper backing. These are not for wet areas and will not work.
The most important part of the peel and stick shower installation is the surface preparation. The tiles may be flawless but if the wall behind them is not prepared and waterproofed properly, moisture will penetrate.
Peel and stick shower tiles work best when installed over a cement backer board that is covered with a liquid waterproofing membrane. Bonded sheet membrane waterproofed drywall is also acceptable. If the grout joints are filled off flush and the surface is properly primed, sound existing tile in good condition can be used as a substrate.
If you aren't sure, check to be sure that your product is rated for shower use.
Look at the manufacturer's sheet or spec page – NOT the product name and NOT the store description. Check to see that it does specifically allow use in continuously wet areas. Gather supplies: measuring tape, level, pencil, squeegee or roller, rubbing alcohol, clean cloths, 100% silicone caulk, caulk gun and waterproof seam tape (if recommended by the manufacturer).
You need to have a fully cured and dry waterproofing membrane. Take your time on this step: putting tiles over a wet membrane will not work. For liquid membranes, adhere to the manufacturer's recommended cure time.
Measure the wall carefully and dry-lay tiles with backing on to calculate the pattern, minimise pattern waste on cuts and prevent seams from being in the highest splash area. Make paper templates for faucet, fixture and soap dish cuts.
In some instances, a high-bond primer is used preceding the peel and stick tiles to get them to adhere to a substrate better. Look at the instructions for your product: Don't miss out on the recommended primer as you'll be paying for such an error later in the shower application.
For straight cuts use a sharp utility knife and a metal straight edge. It is no longer a factory sealed product at the cut edges, so use a thin bead of silicone caulk on all cut edges before installing them.
Begin at the bottom row and go up. If you have large sheets, peel back two to three inches of backing and align it carefully, smoothing and flattening the exposed area, then gently peel and smooth it down the sheet. Press air bubbles out and make sure the entire surface is in contact by using a squeegee or roller.
Seal all seams, edges and perimeter — Final step and most important!
Use 100% silicone caulk at all four corners, at all sheet joints, at the top edge and where the tile is to be connected to the tub surround, shower base and fixtures. If your product suggests waterproof seam tape at the overlapping edges, apply the tape before caulking on top. Use a wet finger or caulk tool to smooth the caulk, and let it cure completely before exposing it to water.
Avoid showering too early. A majority of manufacturers recommend 24 to 72 hours prior to water exposure. The adhesive cure time recommended by Yipscazo is 48 hours. Do use another bathroom during this time.
Before you close your cure window, inspect all seams, corners and edges. If any edges are lifted up, press them down and close any gaps in caulking before it sets. The few minutes spent looking into this now will save you the headache of having to remove the tile later.
If the product is used correctly, the waterproofing is right, the work is done well and maintained properly, peel and stick shower tiles can have a lifespan of five to ten years. In high moisture environments, lower quality products and adhesives can be expected to fail within 6 months of installation.
This is one of the riskier applications and is generally not recommended. Shower floors face standing water, foot traffic, and constant pressure; conditions that are not at all recommended.
In a bathroom with daily showers, realistic expectations are three to seven years with a good product and perfect installation.
Yes, in some cases. The existing tile must be clean, flat, and in good condition. Fill grout lines with a leveling compound so the surface is smooth.
A hair dryer or heat gun applied to the tile surface softens the adhesive and makes peeling significantly easier. Work slowly from a corner, applying heat as you go.
Use 100% silicone caulk; not latex caulk, not grout, not caulk with additives. Apply it to every seam between tiles, all four interior corners, the top edge of the installation, and the joint where tile meets the tub surround or shower base.
No waterproofing membrane on the substrate, installing over a surface that was not fully clean and dry, skipping edge sealing entirely or doing it poorly, choosing a product without an explicit shower rating, and using the shower before the adhesive has fully cured.
When the necessary materials, conditions and waterproofing and sealing for successful peel and stick shower installation seem too overwhelming for your needs, the following are alternatives:
1. Traditional ceramic/porcelain tile:
For good reason, the standard of shower installations is set. When installed properly on a waterproofed base over a waterproofed substrate and properly grouted, ceramic and porcelain tile can be used for many years with little care.
2. Acrylic and Solid surface shower panels: These are large surface panels especially intended for wet room use. No grout lines, no complex sealing, and installation is made easy as ceramic tile! They are easily accessible, user-friendly and truly waterproof.
3. Tile-grade waterproof wall panels: These engineered panels can be directly used with traditional tile, eliminating the need for cement backer board or other waterproofing layers.
Careful product selection, proper substrate preparation, appropriate waterproofing, and patience and meticulous job site work are the only factors that make the peel and stick tiles function in a shower. If you cut corners anywhere in that chain, it will be a mess in months, not years.
Peel and stick tiles come in handy for the right job — for a quick bathroom makeover for a guest bathroom that doesn't get a lot of use, for a rental property that requires a temporary facelift before a major remodel or for a home that needs a temporary improvement before a full renovation. They're easy, within reach for an organized DIY enthusiast, and certainly eye-catching.
If you're looking for a bathroom, a family shower, a steamy room or anywhere else where durability is more important than an up-front cost savings, then traditional ceramic tile or shower-specific panels are the more secure bet.


