align and interlock peel and stick tiles

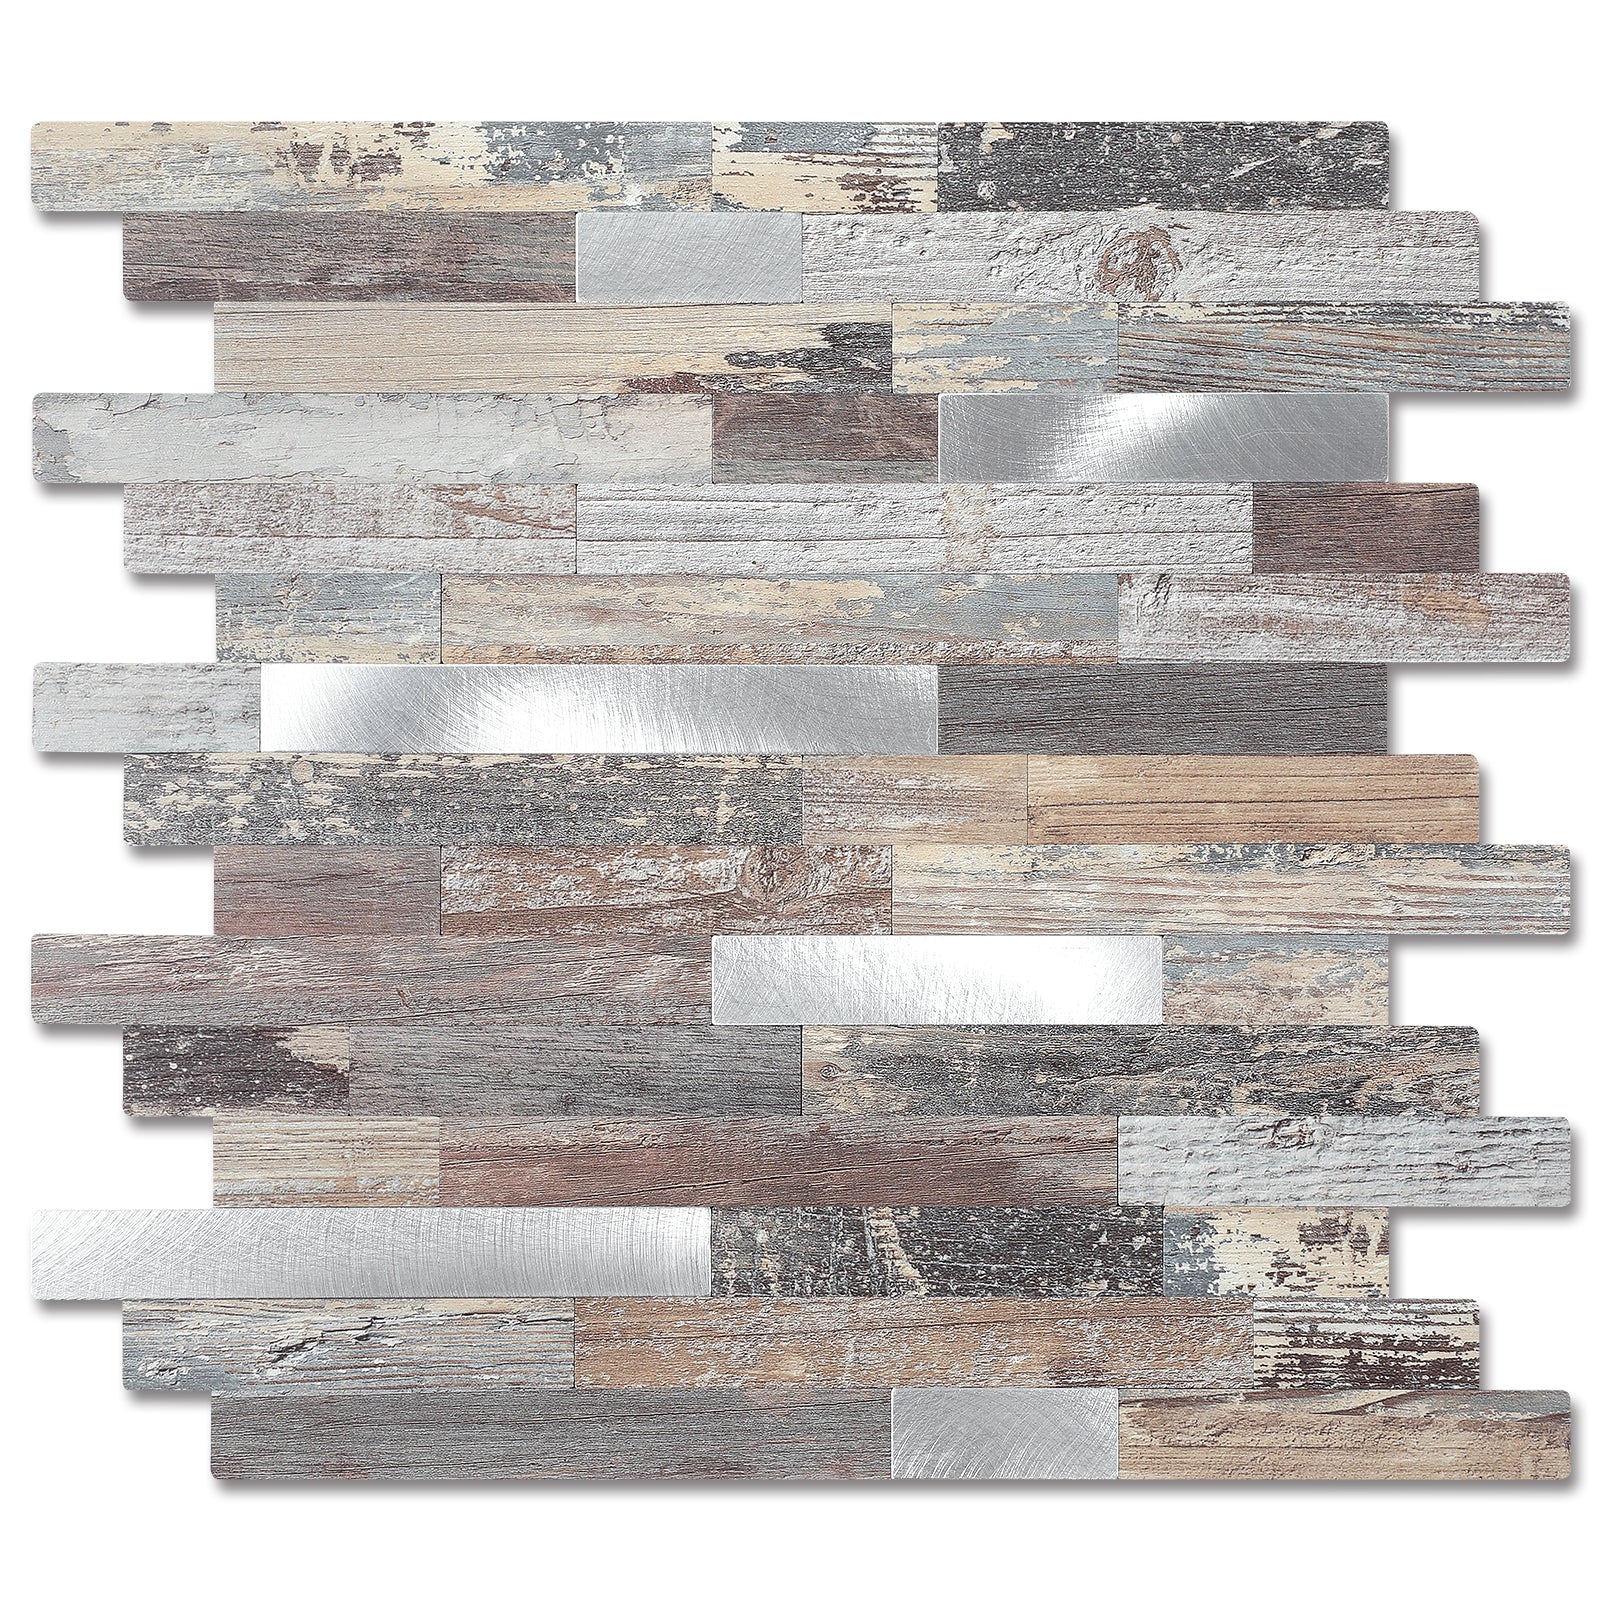
Peel and Stick Backsplash Guide: 10 DIY Tricks for Installation

Written by: chenqiyu

|

|

Time to read 8 min

Peel and stick tiles for the backsplash are an instant way to update your walls without hiring a contractor. Unfortunately, not knowing good installation techniques may lead to bubbles or raised tiles at the corners.

That is why we will present you with 10 DIY tricks to avoid common installation errors. You'll learn what to do before opening the box, like temperature, surface prep, and how to measure. In addition, you will find the exact way to cut and apply tiles with hinge method and center-first layouts.

Read this guide to the end to learn step by step installation and smart troubleshooting that make your backsplash error-free. As a bonus, you might also explore some premium peel and stick tiles collections that suit your taste.

Why Do You Need Peel and Stick Backsplash Tricks?

First you must understand why peel and stick backsplashes come in handy, instead of jumping into tricks directly. In this way, you will be prepared for what to expect before you start installing tiles.


1. A Faster Upgrade Without the Construction Mess

  • Peel and stick tiles skip thin-set mortar and long drying times.
  • Most DIY homeowners can refresh a backsplash in a very short time, and still use the kitchen the same day.

2. Easier on the Budget

  • You mainly pay for the peel and stick tiles and a few prep supplies.
  • No tile saws to rent, no contractor labor, and fewer unexpected costs.
peel and stick backsplash for bathroom
peel and stick backsplash for kitchen

3. Renter-Friendly and Reversible

  • With gentle heat and patience, many peel and stick products can be removed later with minimal wall repair.

4. Designed for Smooth & Well-prepped walls

  • When the surface is flat, clean, and degreased, the adhesive gets full contact and the finish looks surprisingly professional.

When you skip a prep or layout, it often leads to:

  • weak adhesion that slowly lets corners lift
  • premature peeling in warm or humid spots
  • visible seams that draw the eye immediately
  • crooked lines and misalignment across the wall
  • a final look that feels a little cheap

These problems aren't about the tiles, but they're about the process. And that's exactly why it matters for you to learn its tricks properly.

Bonus Tip: For winter collection, check out peel and stick tiles for fireplace makeovers.

Essential 10 Peel and Stick Backsplash Installation Tricks for a Perfect Finish

Make sure to go through all these 10 peel and stick installation tricks before you start sticking anything to your wall.

Trick 1: Let Your Peel and Stick Tiles Acclimate (48-Hour Temperature Test)

  • Peel and stick tiles happen to show expansion and contraction with temperature. Edges can lift later if you install them straight out of a cold box.
  • Take off the tiles from covering and leave them in the intended room for at least 24-48 hours.
  • Keep the room at a steady & comfortable temperature (not next to a heat source).

Why It Helps: It makes the peel and stick tiles "settle" so they don't warp or curl once they're on the wall.

Trick 2: Clean the Right Way (Use Isopropyl After Soap)

Adhesive doesn't stick to grease, even invisible kitchen residue.


Do this cleaning sequence:

  • Make sure to wash first with soapy water for dust removal.
  • The wall that is near the stove needs degreaser application for cleaning.

At last, you can finish with 90%+ isopropyl alcohol and a lint-free cloth.

clean peal and stick tiles with isopropyl

Why It Helps: Soap alone leaves a film. The alcohol removes that film and evaporates cleanly, giving the adhesive the best possible bond.

Trick 3: Measure & Dry-Fit (With a Center-First Layout)

  • Find the center of the wall and mark both a vertical and a horizontal line using a level.
  • Then dry-fit tiles on the counter below (no backing removed yet) just to see how the pattern lands.
  • Adjust the layout until both ends finish with similar-sized cuts. Capture a photo on your phone so you remember the installation layout precisely.
measure layout for peel and stick tiles

Why It Helps: Measuring layout first assists you in avoiding unwanted seams and get error-free backsplash.

Trick 4: Start from the Center (Symmetry Trick for Patterned Tiles)

  • Make sure to begin installation from the center after planning the layout.
  • Patterns like hexagon look best when they radiate outward from a centered line. Take photo of a level line and build outwards carefully.

Why It Helps: This keeps both sides balanced and prevents the pattern from spoiling as you work across the wall.

Trick 5: Clean Cuts Every Time (Use Proper Tools)

Clean cuts make the difference between a "DIY" project and a "professional" artwork.

Make sure you use:

  • Sharp utility knife with fresh blades
  • Metal ruler or straight edge
  • Contour gauge for pipes or odd corners
  • Fine-tooth saw in case you are using thicker panels

Make a quick cardboard template first for tricky spots (like outlets). Trace the shape and then transfer to your tile.

cut peel and stick tiles cleanly

Why It Helps: Clean cutting reduces mistakes and wasted pieces as well.

Trick 6: The Hinge Method (Install Large Peel and Stick Panels Without Bubbles)

Large sheets can trap air easily. However, the hinge method fixes that.

Peel back only 2-3 inches of the backing and crease it. Align the tile perfectly and press the exposed strip to anchor it. Then slowly pull the rest of the backing away while smoothing downward.

hinge method for large peel and stick tiles

Note: Never peel the entire backing at once because that's how bubbles form and tiles end up crooked.

Trick 7: Press for Bond (Roll & Wipe to Remove Air Pockets)

After each tile goes up, press it firmly so the adhesive fully grabs.

You can use:

  • a hand roller
  • a plastic squeegee
  • or the flat edge of a trowel wrapped in cloth

Don't forget to apply pressure from the center outward. Do it once immediately and repeat it after 24-48 hours.

Why It Helps: Pressing the adhesive tiles make them stick strongly that could avoid corners lifting.

Trick 8: Seal the Edges with 100% Silicone (Waterproof Finish)

Water is one of the most common enemies of your tile seams.

Use 100% silicone anywhere moisture can penetrate through the backsplash:


  • along the countertop edge
  • around the sink
  • beside the stove
  • open edges or end caps

Cut the tip small and smooth it with a damp finger or caulk tool.

seal peel and stick tiles edges with silicone

Why It Helps: Silicone application keeps water out and reduces peeling quite effectively.

Trick 9: Wait 72 Hours (Let the Adhesive Cure)

Peel and stick uses pressure-sensitive adhesive and needs time to settle.


For the first 72 hours:

  • avoid scrubbing
  • avoid cleaners and sprays
  • keep the heat and steam low

Don't hang hooks or rails on the backsplash

Why It Helps: Letting the adhesive tiles undisturbed for a sufficient time gets a longer-lasting hold.

Trick 10: Long-Term Care (Cleaning, Repairs & How to Remove Old Tiles)

Peel and stick tiles don't require too much maintenance but they still need gentle care.

  • Don't forget to use mild dish soap and water for everyday cleaning.

  • Avoid applying strong chemicals because they can dull the surface.
  • Warm a loose corner with a heat source and press it back for gentle repair.
  • Heat the tiles and peel them slowly if you ever need to remove tiles entirely.

Why It Helps: With these maintenance tricks, your peel and stick backsplash stays fresh for long.

In case you need help in choosing the perfect kitchen backsplash tiles, explore this guide.

Quick Backsplash Troubleshooting: Common Problems & Fast Fixes

Even though you know now all the essential tricks for flawless peel and stick backsplash, there might be some uncertain issues. If something doesn't look right, these quick fixes usually solve it fast.


1. Air Bubbles Under a Tile

  • Puncture the bubble with a tiny pin and press the air out toward the hole. Then burnish with a roller or flat tool.
  • Warm the area with a hair dryer and lift slightly for large bubbles. Then make the adhesive smooth and reapply.

2. Lifted Corners or Edges

  • Warm the corner with a hair dryer and press firmly with a roller, holding it for 30-60 seconds.
  • Clean the wall and tile back with isopropyl if it won't stick. Then use a thin bead of construction adhesive behind the tile and press.

3. Visible Seams Or Gaps

  • Run a thin bead of paintable silicone caulk into the seam if needed.
  • Trim a replacement edge piece and caulk the join for larger gaps.

4. Crooked Rows Or Misalignment

  • Remove the affected tiles (heat first) and re-measure from the centerline. Then reapply using the hinge method and a level.
  • Dry-fit before sticking.

5. Stains Or Sticky Residue

  • You can use soapy water or rubbing alcohol for stain removal.
  • Try adhesive remover on a small test area for stubborn adhesive.

6. Tiles Won't Stick On Textured Walls

  • Consider adding a smooth underlayment panel or replacing problem tiles with a different material in that zone.
hexagon peel and stick tile for kitchen

FAQs

1. Can I install a peel and stick backsplash on a heavily textured wall, and what's the best trick to make it work?

Yes. Make sure to sand high spots and fill deep hollows with joint compound. Finally, finish with a wipe of 90% isopropyl alcohol so the adhesive gets full contact.

2. What is the best way to remove a peel and stick backsplash later without damaging my walls?

The best way is to warm each tile with a hair dryer to soften the adhesive. Then peel slowly at a low angle and pull parallel to the wall. You can use a plastic scraper for stubborn spots and clean residue with rubbing alcohol.

3. Is it safe to use peel and stick tiles directly behind my stovetop where there's heat?

Usually no. Most peel and stick vinyl isn't rated for intense heat. That's why always check the product's heat rating before installing near a cooktop.

4. How can I make the seams between individual peel and stick tiles less visible?

Center your layout, dry-fit tiles, and butt edges tightly. After sticking, press seams with a roller so edges sit properly. For any visible gaps, run a thin bead of paintable silicone and touch up with matching grout paint if needed.

5. Can I peel a tile back up to reposition it without ruining it, in case installation fails?

Usually yes. Gently lift an edge and reposition. Warm the tile with a hair dryer to loosen it first if the adhesive has set. Repeated re-peels reduce stickiness, so replace the tile if it loses adhesive strength.

Conclusion

In conclusion, a peel and stick backsplash can entirely update your kitchen or bathroom walls finishing without professional labor. However, you must be aware of troubleshooting its installation complications to make this DIY tile project work.

This guide has walked you through why peel and stick tiles are trendy, along with step-by-step installation tricks. Besides, you are now informed of some commonly caused adhesive tile problems and how to conveniently deal with them.

Want a bonus recommendation from us? Head over to Yipscazo Tiles and look for the styles that fit your space and budget in case you're ready to shop.